Calabash is a nice automation testing framework. It differs form from other solutions like KIF because the tests are written and run using Cucumber, a BDD framework from the Rails world which main selling point are human readable "features", written in a Ruby DSL.
At the time of writing, the suggest installation method is to either use the experimental calabash-ios setup command, or to create a new Target and add the calabash binary to it the old "drag-n-drop" way.
In my opinion setting it up this way has at least two downsides:
- Having a second target means that when adding a new file the developers need to add it to both targets, every time. This is quite error prone...
- There is no automated way to track new versions of the binary.
Build Configuration + CocoaPods based setup
The solution I propose removes both the upgrade automation problem, and the annoyance of having to add files to multiple targets.
By using CocoaPods we can automate the version updates, and by using a custom Build Configuration we can use the main Target, and new files will always be there.
The setup process is quite straightforward, and you can follow it on this example repo while reading along.
1. Get Calabash
Calabash is distributed via RubyGems, so getting it is as easy as running:
gem install calabash-cucumberTo verify that the installation has been successful type calabash-ios, you should see a print of all the possible commands.
2. Create a new Build Configuration
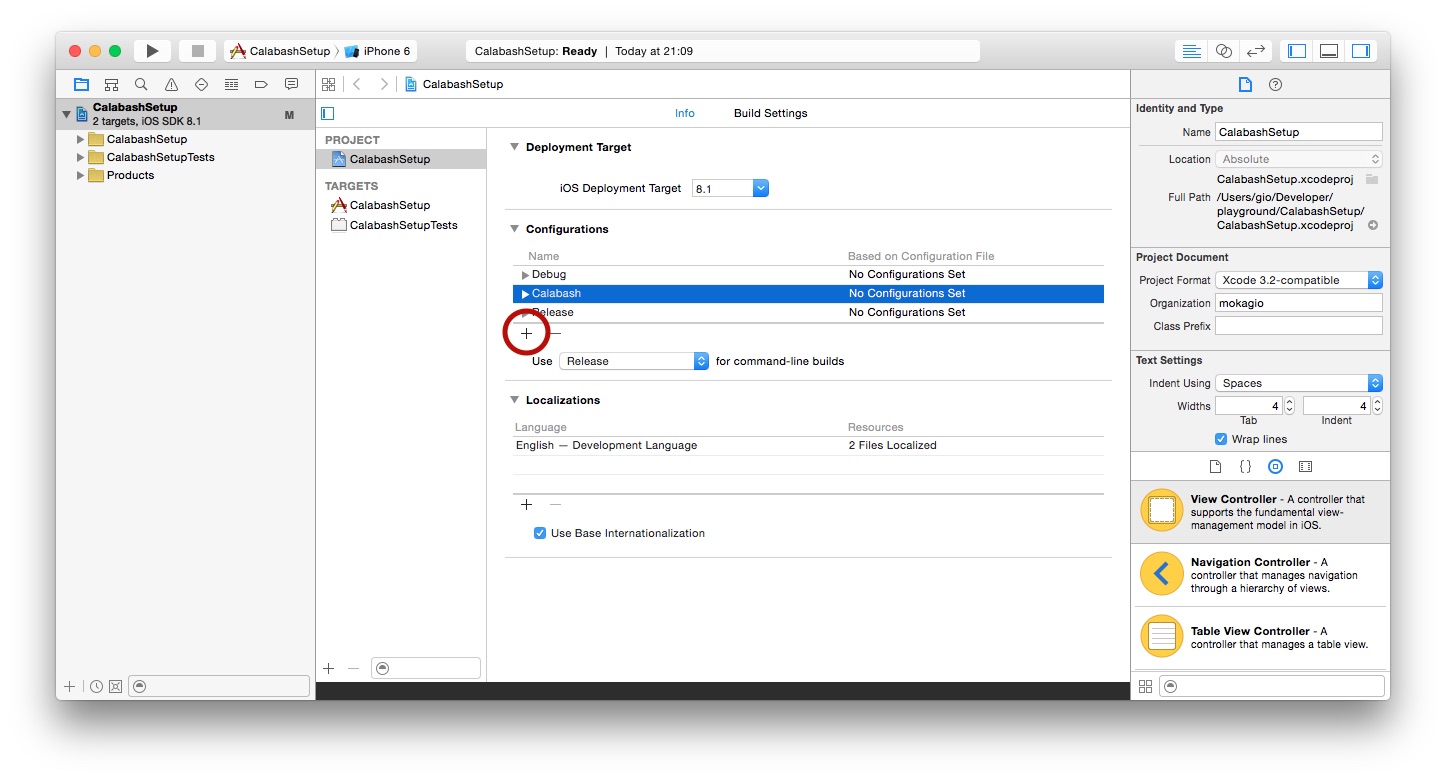
Adding a new Build Configuration to an Xcode project is done by going to the Project > Info tab, mind Project not Target, going to the Configurations section and pressing the plus button. Adding a new Configuration is actually nothing more than duplicating an existing one.

3. Add Calabash through CocoaPods
Calabash works by connecting to the app in the Simulator or device via HTTP. To make this happen we need to add a binary to our app, which will start the server that we'll connect to.
The Calabash CocoaPods takes care of all the setup operations for us, but we don't want the Calabash binary to be in the ipa we'll submit to the store.
Since version 0.34 CocoaPods allows us to install pods with a configuration granularity, which is awesome. This is why we added a dedicated configuration, to leverage on this feature and avoid Calabash leaking into production.
target 'MyAwesomeApp' do
  pod 'Calabash', :configurations => ['Calabash']
end
Now simply pod install and Calabash will be integrated in your project.
4. Create a Calabash scheme
The final piece of the puzzle is to have a way to run our app in the Calabash configuration, so that the local server will be started and the calabash cli will be able to contact the app to run the automation tests.
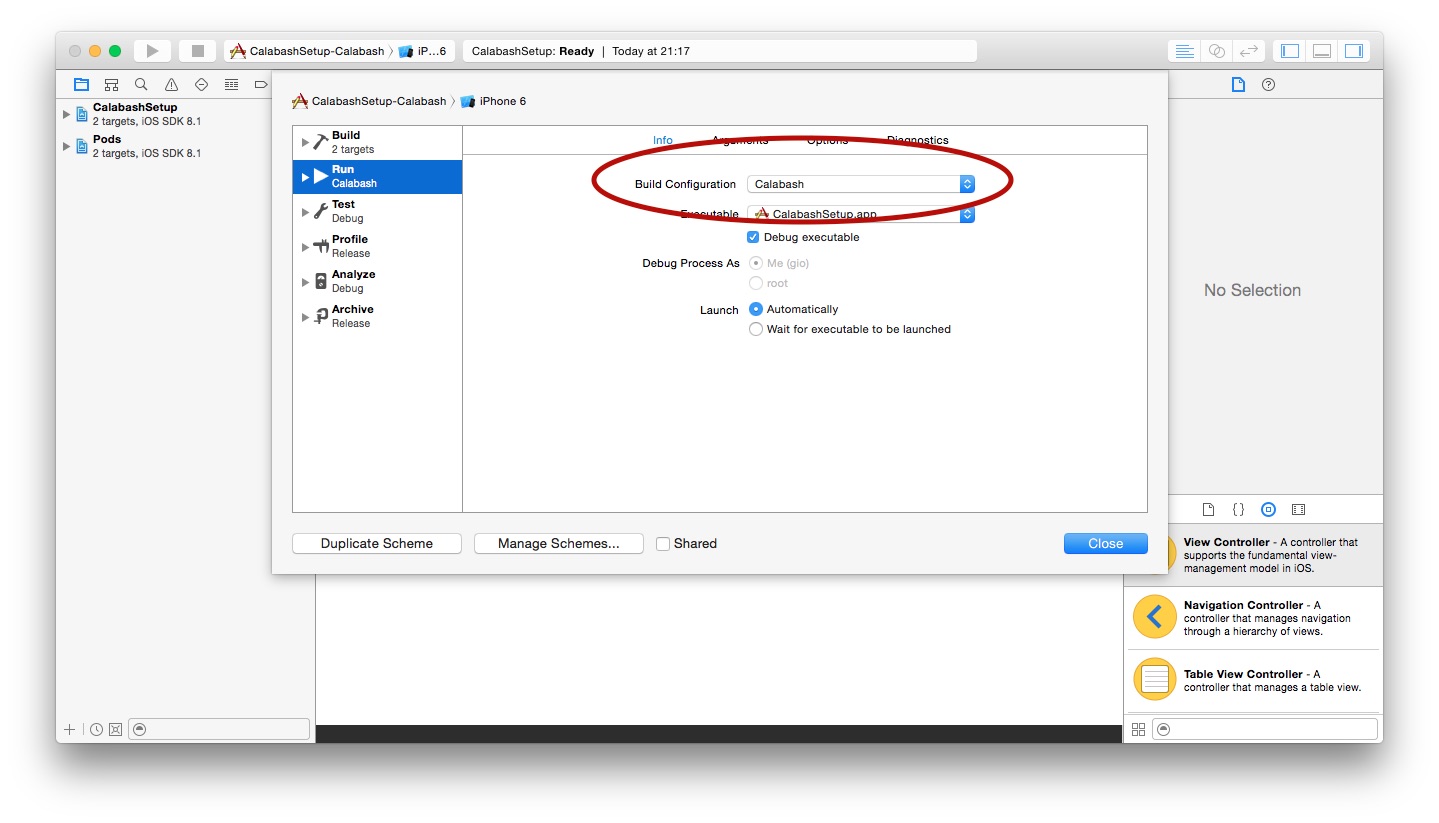
To do this just create a new Scheme, and set the Run > Build Configuration option to Calabash.

Now select the new Scheme and Run. If everything has been successful you'll see an output similar to this:
2015-01-25 21:20:35.693 CalabashSetup[33579:257892] Creating the server: <LPHTTPServer: 0x7fa4fbc07940>
2015-01-25 21:20:35.693 CalabashSetup[33579:257892] Calabash iOS server version: CALABASH VERSION: 0.12.0
2015-01-25 21:20:35.694 CalabashSetup[33579:257892] simroot: /Applications/Xcode.app/Contents/Developer/Platforms/iPhoneSimulator.platform/Developer/SDKs/iPhoneSimulator.sdk
2015-01-25 21:20:35.697 CalabashSetup[33579:257892] Started LPHTTP server on port 37265
2015-01-25 21:20:35.876 CalabashSetup[33579:257972] Bonjour Service Published: domain(local.) type(_http._tcp.) name(Calabash Server)
Congratulations! You're Calabash setup with CocoaPods and Build Configurations is completed!
If you had any problems during the setup tweet me for help @mokagio, or check the example repo.
Happy acceptance testing with Calabash