The Multiple Builds Dream
Working in Memrise on CatAcademy I've been massively using TestFlight to test new features before releasing the next versions of the app. One thing that always annoyed me was the fact that my development version overrode the release one, or that I couldn't keep a "stable" build and a "development" build on my device at the same time.
After attending the Facebook Mobile DevCon 2013 in London, where the talk from Alan Cannistraro on how Facebook made their iOS app I realized that having multiple builds of the same app was possible. But how to do it?
I did some research and found this post, which had almost all the info I need on how to setup my multiple builds infrastructure. There's no point in me copy-pasting what's written there, besides I'm sure 99.9% of you readers already opened the link in a new tab.
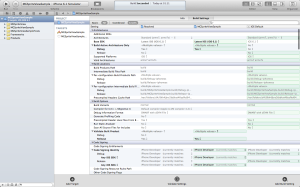
The post is pretty old, so here's an updated screenshot of the Build Settings editor.
If you follow the instructions and run the app on the simulator or on the device, you'll see the new development app appearing next to the release one, as expected.
This is pretty handy to go around with the two versions of the app and to some user testing with the friends, but guess what? It doesn't work with TestFlight! But fear not, there are only two other steps to make before reaching the goal.
Making a Development Archive
First problem: when we archive the app the Release configuration is used. Changing this option is pretty easy through the "Edit Scheme…" menu, but wait a second! If we change now the Build Configuration for the archive action from Release to Debug, we'll have to change it back once we're going to publish on the App Store. Better creating a new Scheme and change the configuration in that one.
"Changing the Scheme every time we want to submit it just as annoying as editing it". Fair enough. But not really… Switching Scheme requires 2 clicks, while editing it at least 6. :P No, seriously switching Scheme is something we can easily automate, using xcodebuild or xctool and a couple of lines in your favourite scripting language.
Making it work on TestFlight
All right! Now we're finally able to archive our development version of the app and upload it on TestFlight, maybe through the TestFlight App which is nice and fast. But if we try to do it this is the result:
The provisioning profile is made for distribution builds but your app is built for development. Please select a valid development identity to continue.
Don't panic! The message gives us a tip already on how to solve the issue, we just need another Provisioning Profile! Select Development when creating the new profile and use the AppID of the "original" app. This last point surprised me, but I think it may have something to do with the sort of hierarchy structure the bundle ids have.
Once your Provisioning Profile is ready update the certificates list in Xcode, through the Organizer window, and proceed to Archive the app. Now when you'll upload the archive with the TestFlight App the new development certificate will appear.
Here we go!
Further Steps
- Add other Build Configurations, such as Testing, and other options, for example to have different icons for the different builds.
- Manage the archive operation with xctool.
- Automate even further using the TestFlight Upload APIs.
